
Headspace is one of those dimensions that is easy to discuss and easy to misunderstand. In a .22 LR rifle it is measured in hundredths of a millimetre, yet it can influence how consistently the cartridge is supported and ignited.
That does not mean every CZ 457 needs to be shimmed. A factory rifle must work with many ammunition brands, rim thicknesses and levels of fouling, so some operating clearance is intentional. The purpose of headspace tuning is not to make the bolt as tight as possible. It is to measure the rifle, understand the ammunition you actually use, remove unnecessary clearance if appropriate, and keep completely reliable function.
For a shooter who uses one preferred .22 LR ammunition brand or lot, a bolt shim is a simple and reversible way to test that adjustment without machining the barrel or bolt.
What is headspace in a .22 LR rifle?
.22 LR is a rimmed cartridge. The front face of its rim stops against the breech end of the barrel, while the recessed bolt face supports the rear of the case. Headspace is the distance available for that rim when the bolt is fully closed and locked.
On a CZ 457, total headspace is made up of two dimensions:
“Bolt recess depth” + “closed bolt to barrel gap” = total headspace
This distinction matters. Measuring only the recess in a removed bolt does not tell you the rifle’s complete headspace. The position of the locked bolt relative to the barrel must also be included.
The current SAAMI rimfire standard specifies .22 LR headspace from .043 to .051 inch (1.09 to 1.30 mm). It also permits a broad range of cartridge rim thicknesses. Those dimensions are designed around safety, reliability and interchangeability across commercial rifles and ammunition; they are not a promise that every value in the range will produce identical results in a particular precision rifle.
Why would you adjust CZ 457 headspace?
Factory tolerances allow the same rifle to function with different ammunition brands, including cartridges with relatively thick rims, dirty ammunition and a fouled chamber. For general use, that is exactly what most shooters want.
A precision shooter may have a different priority. If the rifle is used with one selected ammunition brand and lot, excessive clearance can allow the cartridge to sit slightly differently from shot to shot. Reducing that unnecessary movement may provide:
- more consistent support of the cartridge rim;
- more repeatable firing-pin energy transfer;
- fewer light strikes where excessive clearance was part of the cause;
- more uniform ignition and velocity;
- a possible reduction in vertical dispersion or unexplained flyers.
The important word is possible. Headspace is only one variable. Ammunition lot, chamber geometry, barrel condition, action-screw torque, wind and shooter input can all have a larger effect. A shim is a tuning tool, not a guaranteed accuracy upgrade.
What happens when headspace is too loose or too tight?
| Condition | Possible effect |
|---|---|
| Excessive clearance | The case can move forward under the firing-pin strike, reducing the effective impact and making ignition less consistent. In severe cases it can contribute to misfires or poor case support. |
| Appropriate clearance | The rim is supported consistently while the bolt still closes normally on every cartridge in the intended ammunition lot. |
| Insufficient clearance | The bolt becomes difficult or impossible to close, especially on a thicker rim or with chamber fouling. Forcing the bolt can pinch or crush a primed rim and is unsafe. |
Tighter is therefore not automatically better. The correct setting leaves positive clearance and reliable bolt operation. It must tolerate the thickest normal cartridge in the lot, not merely the thinnest one measured on the bench.
Measure the ammunition as well as the rifle
Before changing the rifle, decide what it needs to do.
If you regularly switch among bulk, hunting and match ammunition, keep enough headspace for all of it. A setting tuned around one thin-rim match lot may not accept another ammunition brand with thicker rims, particularly in a dirty or cold rifle.
In our experience, Lapua and SK ammunition generally has thicker rims, while ELEY—and Tenex in particular—has some of the thinnest rims on the market. This is why a headspace setting that works perfectly with ELEY may be too tight for Lapua or SK. Brand is only a starting point, however: dimensions can vary among products and lots, so measure the ammunition you will actually use.
If the rifle is dedicated to a preferred match-ammunition brand or lot, sample the rim thickness of multiple cartridges using a purpose-made rim-thickness gauge. Do not build the setting around a single round. Record the minimum and maximum, not only the average.
As a practical precision-rimfire starting point, we advise retaining at least .001 inch (one thousandth) of headspace above the thickest rim in the intended ammunition sample. For example, if the thickest sampled rim is .041 inch, the working headspace should be no tighter than approximately .042 inch. This is a minimum-clearance guideline rather than a universal setting: every rifle and ammunition lot must be tested individually, and reliable function takes priority over the smallest possible number.
There is no universal “best CZ 457 headspace” number. Internet recommendations are useful as context, but the safe setting is determined by the dimensions of your rifle, the ammunition it must accept and proper headspace gauges. Shooters intending to work outside the manufacturer’s or SAAMI dimensional specification should have the rifle evaluated by a qualified rimfire gunsmith.
How to measure headspace on a CZ 457
There are three practical methods. Whichever one you use, begin with an unloaded rifle, remove the magazine, inspect the chamber visually and physically, and keep live ammunition away from the work area.
Method 1: an incremental .22 LR headspace gauge set
A purpose-made set such as the Whidden Gunworks .22 LR Headspace Gauge Set is the clearest way to determine the closing point. Whidden offers seven-gauge sets covering .039–.045 inch or .046–.052 inch, as well as a complete .039–.052-inch set. Each gauge is individually marked in .001-inch increments.

- Clean the chamber, barrel breech and bolt face. Wax and fouling can change the result.
- Prepare the bolt as directed by the gauge manufacturer. Some gauge designs require removal of the extractors or firing-pin assembly so that spring tension does not disguise the true feel.
- Insert the thinner gauge and close the bolt gently.
- Repeat with progressively thicker gauges until the bolt no longer closes normally.
- Record the thickest gauge on which the stripped bolt closes freely and the next gauge on which it does not.
Never force the handle. Bolt-closing effort is a useful warning, but it is not a substitute for a dimensional reading.
Method 2: use the bolt shims as comparative gauges
The shims themselves can also establish how much removable clearance exists between the locked bolt and barrel breech. This is a practical fitting method when an incremental headspace gauge set is unavailable. This method works best if you remove your firing pin spring, c-clip spring, ejector and holder, but works with a fully assembled bolt as well.
You will need a couple spent cases of the ammo that you are planning to use. Testing with a live round is also an option, but only at a range with the barrel pointing in a safe direction.
- Clean the bolt face and barrel breech, insert spent case into the chamber and check that the unshimmed bolt closes normally.
- Install the thinnest shim, reassemble the bolt and test closure on the same spent case, using only normal handle pressure.
- Progress to the next shim thickness, checking the with the bolt handle after every change.
- Stop when the bolt becomes noticeably difficult to close. Never force it.
- Remove that shim and go back one thickness step. The previous shim is the maximum practical starting point for further verification.
- Confirm normal closure across a representative sample of the intended ammunition at the range.
This method is gratifying because it doesnt require any tools or calculations.
Method 3: depth measurement plus a feeler gauge
The CZ 457 also permits a direct calculation. This method requires more disassembly and careful measuring technique.
- Remove the bolt and clean its face.
- Measure the depth of the case-head recess from the raised outer bolt face to the flat rim seat. A depth micrometer is preferred; a good caliper can work if the reading is repeated at several points. Avoid the extractor cuts and firing-pin opening.
- Remove the action from the stock and remove the components necessary to access the bolt/barrel interface. The CZ 457 headspace measurement guide shows the magazine housing and bolt guide removed for this measurement.
- Reinstall and close the bolt with the action cocked. On the CZ 457 the bolt position can change slightly after the firing mechanism is released, so this measurement must be made in the cocked condition. Engage the safety.
- Insert narrow feeler gauges between the outer bolt face and barrel breech until you find a snug, repeatable fit.
- Add the bolt-face recess depth and the bolt-to-barrel gap.
For example:
.037-inch bolt-face recess + .009-inch bolt-to-barrel gap = .046-inch headspace
If you are not confident in the disassembly, measuring access or repeatability of the readings, use proper gauges or ask a gunsmith. An error of .001 inch is significant in this job.
How CZ 457 bolt shims adjust headspace
The CZ 457 bolt handle assembly establishes the locked position of the bolt. A correctly sized shim fitted between the bolt body and bolt handle assembly advances the bolt face toward the barrel breech. That reduces headspace by approximately the thickness of the shim.
As a simple example, a rifle measured at .046 inch with a .002-inch shim should finish close to .044 inch. Treat that only as the selection calculation: manufacturing tolerances and measuring error mean the finished rifle must always be checked again.
Bolt shims can reduce excess clearance. They cannot correct every headspace problem. They also cannot safely reduce headspace below the physical depth of the bolt-face recess. If the rifle needs a correction beyond the sensible shim range, or if headspace is already too tight, it is a gunsmithing job rather than a reason to keep adding parts. In other words, with bolt shims, you can only reduce headspace, not add it. Headspace is added with barrel shims.
Choosing a Position7 CZ 457 bolt shim
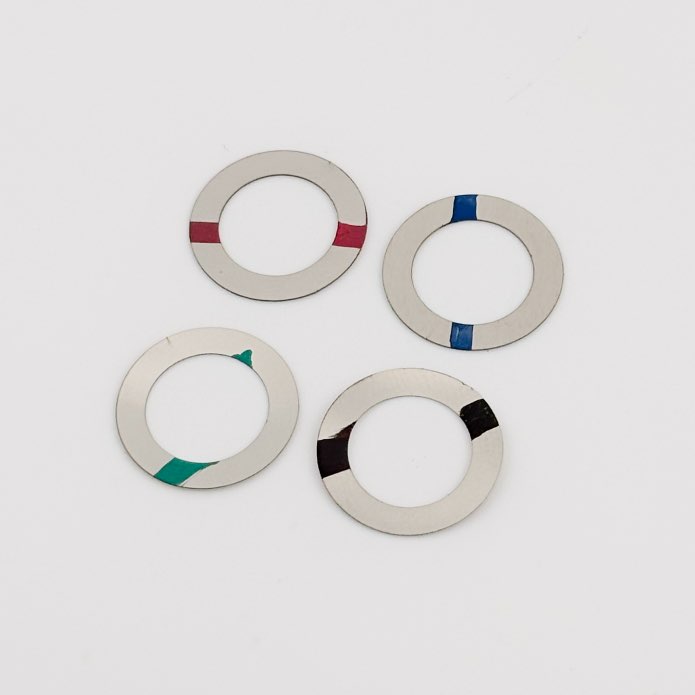
The Position7 CZ457 Bolt Shim Kit is available in metric and imperial four-piece sets.
| Kit | Included thicknesses |
|---|---|
| Position7 metric | 0.03, 0.05, 0.10 and 0.15 mm |
| TriggerShims imperial | .002, .003, .004 and .005 inch |
The two sets overlap around common adjustment sizes, while the 0.03 mm metric shim provides a particularly small first step. Select from the measured difference, begin with the thinnest reasonable option and change only one variable at a time.
Although shims can physically be stacked, one correctly selected shim is preferable where possible: it is simpler to measure, install and reproduce.
Installing and checking the shim
The following is an overview, not a replacement for the CZ manual or a gunsmith’s inspection.
- Make the rifle safe. Remove the magazine, open the bolt and check the chamber visually and physically. Clean the chamber and bolt.
- Remove and disassemble the bolt. Follow the official CZ 457 instruction manual. The firing-pin spring is under tension, so control the components and note their orientation before separation.
- Fit the selected shim. Place it squarely at the interface between the bolt body and bolt handle assembly. A very small film of suitable oil can protect the shim; it should not be dripping or contaminated with grit.
- Reassemble the bolt correctly. Confirm the correlated positions of the bolt body, handle, sleeve and firing-pin assembly. Perform the safety-function check required by the CZ manual.
- Check empty-chamber operation. The clean, empty rifle should close normally. If the handle requires force or feels distinctly bound, stop and use a thinner shim.
- Measure again. Verify the new headspace with gauges or repeat the direct measurement. Do not assume the nominal shim thickness produced an exact one-for-one change.
- Confirm ammunition fit only in a safe range environment. Point the rifle in a safe direction and test cartridges sampled from the intended lot. The bolt must close normally on all of them. Never force it over a resistant round.
- Live-fire for reliability before testing accuracy. Watch for hard closure, misfires, abnormal case rims, difficult extraction or any change in safety operation. Stop immediately if anything is abnormal.
If a thicker shim causes the empty bolt to begin closing harder than normal, step back to the previous thickness. The objective is to remove unnecessary play, not to create metal-to-metal preload or rim crush.
How to test whether the adjustment helped
One small five-shot group proves very little. Use the same rifle setup, ammunition lot, distance and target conditions before and after the change.
A useful test is:
- three 10-shot groups at 50 metres or 50 yards before fitting the shim;
- three 10-shot groups after fitting it;
- the same action-screw torque, support and cleaning state;
- average group size and vertical spread recorded, not only the best group;
- velocity extreme spread and standard deviation recorded if a chronograph is available;
- ignition, bolt feel and extraction noted for every shot.
Reliability has priority over a marginal change on paper. If the rifle becomes ammunition-sensitive, difficult to close or less reliable, return to a thinner shim or the original configuration.
When should you leave the headspace alone?
Do not adjust simply because shims exist. Leave the rifle unchanged if:
- it already closes with minimal clearance and complete reliability;
- you need it to accept a wide variety of ammunition;
- you have not measured the current headspace;
- the accuracy issue has not first been tested with suitable ammunition and consistent rifle setup;
- you have a custom barrel, and your rifle is already correctly headspaced for your ammo by your gunsmith
- you are not comfortable disassembling and function-checking the bolt.
A small, reversible precision adjustment
The value of bolt shims is not that they make every CZ 457 “tighter”. It is that they let a careful shooter make a known, reversible change in very small increments.
Measure first. Choose the thinnest appropriate shim. Verify the finished headspace. Test across the ammunition lot, and retain enough clearance for faultless operation. Done that way, headspace adjustment becomes what it should be: one more controlled variable in a precision rimfire system.
Choose your Position7 metric or TriggerShims imperial CZ457 Bolt Shim Kit