
Welcome to the next level of rimfire reliability. This billet aluminum magazine has been engineered to withstand the rigorous demands of precision rifle competitions and ensure flawless feeding when it matters most. To get the best performance and longevity out of your magazine, please review these instructions carefully.
1. How to Load Properly to Prevent “Rim-Skip”
In rimfire shooting, “rim-skip” can occur in almost any magazine. This happens when the rim of the top cartridge slips behind the rim of the cartridge beneath it. When the bolt pushes the top round forward, it drags the lower round with it, causing a jam.


Rim skip vs properly aligned rims.
The primary cause of rim-skip is improper loading.
Pressing down on the lead part of the bullet to force the cartridge into the magazine squeezes the front of the rounds together. This spreads the rear rims apart, allowing them to cross over and misalign. Additionally, pressing on the soft lead can scratch or deform the bullet, which alters the pressure as it leaves the barrel crown and negatively impacts your precision downrange.
The Correct Loading Technique:
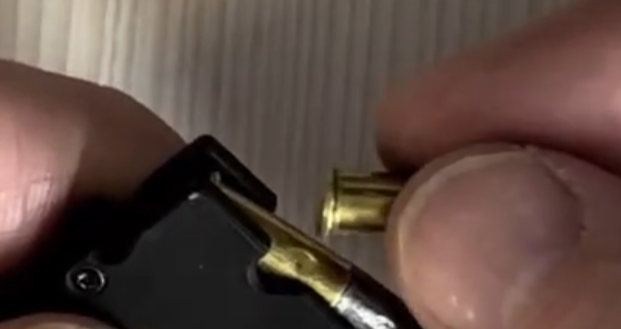
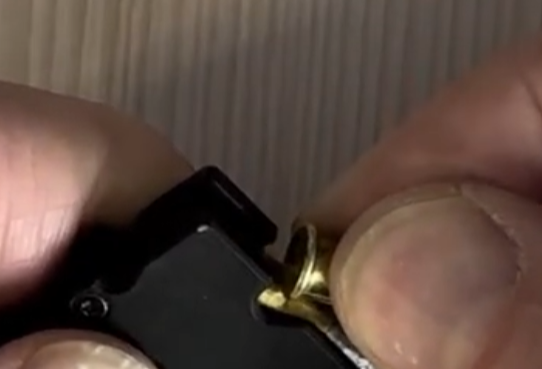
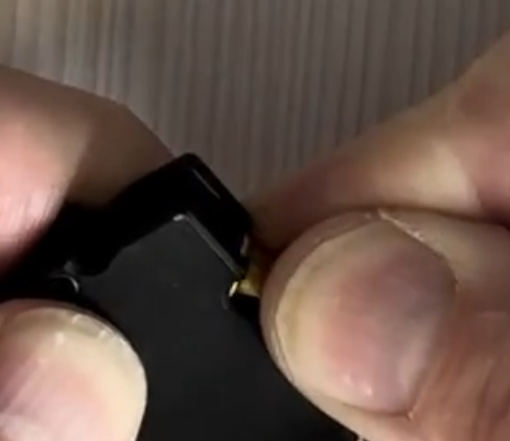
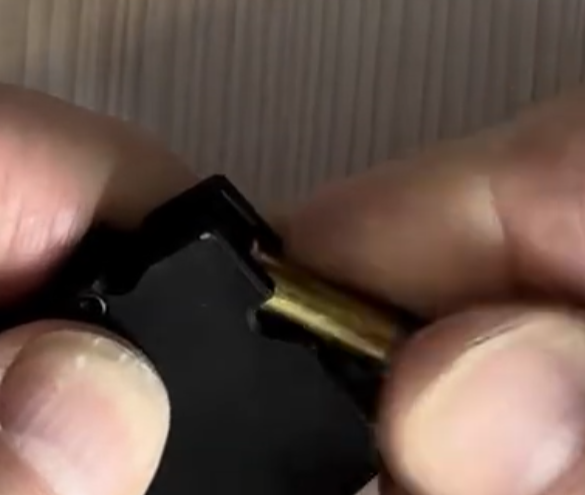
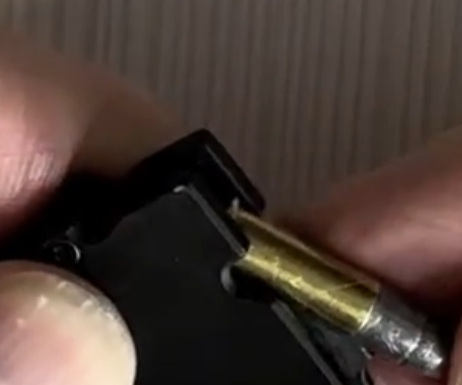
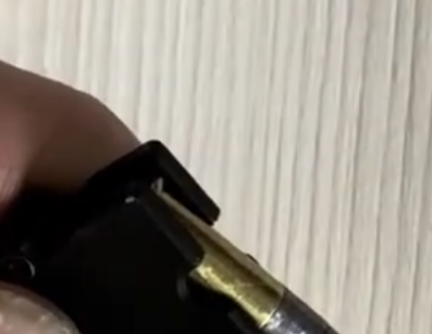
- Locate the Cut: Utilize the specific cut designed into the side of the magazine body.
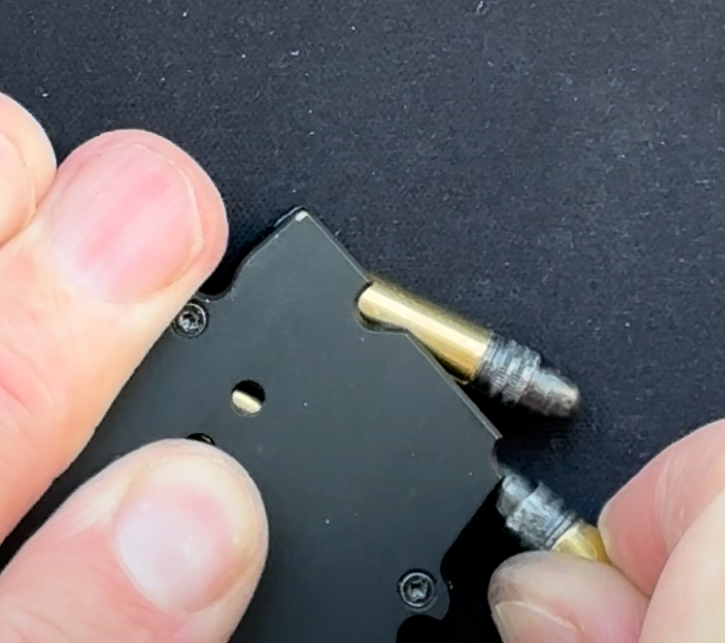
- Aim the Rim: Guide the rim of the cartridge directly into this cut.
- Press Down and Back: Press the rim down securely, hold it, and slide the cartridge all the way to the rear of the magazine.
- Maintain Pressure at Back: Ensure that during loading you press down only on the brass part of the bullet (back) and from lead part is not damaging.
2. Field Fix: Clearing a Rim-Skip Mid-Match
If a rim-skip does occur on the clock, it can be cleared quickly without needing to strip the magazine. A rim-skip almost exclusively happens between the first (top) and second cartridges.
To fix a jammed magazine:
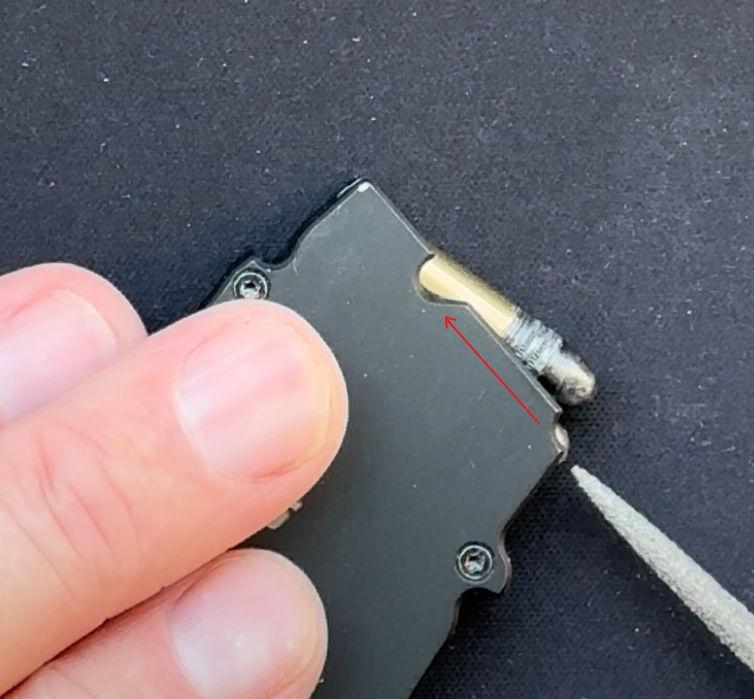
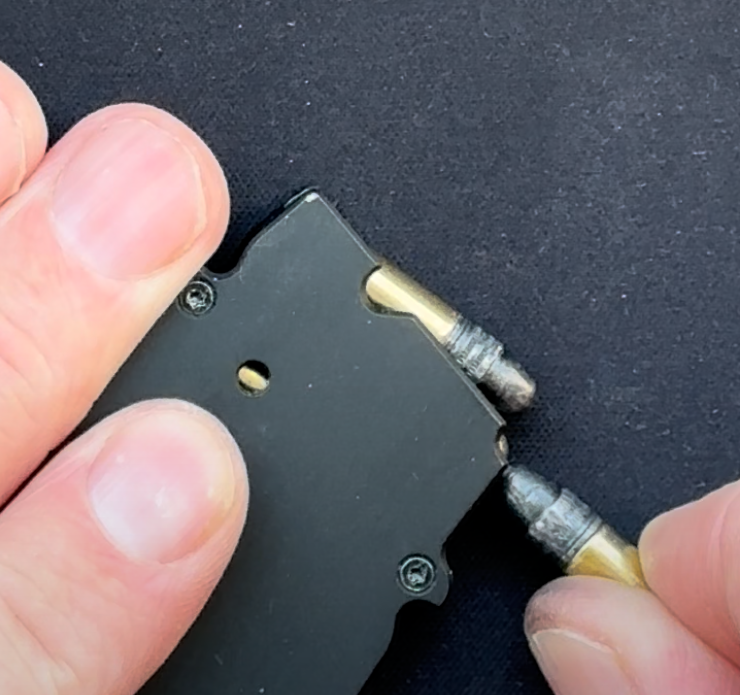
- Find a small, rigid object to reach into the magazine — another bullet, a matchstick, a twig, or even a small stone works perfectly.
- Reach past the top round and place your object directly against the nose of the second bullet (the one directly beneath the stuck top bullet).
- Apply backward pressure, pushing the second bullet straight back along its axis.
- Steadily increase this rearward pressure until you hear an audible “click.” The bottom cartridge will snap back into place by about 1mm, indicating the rims have successfully unbinded and realigned.
3. Maintenance: Deep Cleaning and Disassembly
Under normal conditions, this billet aluminum magazine is virtually maintenance-free. If it is dropped in the sand or mud during a match, run water directly through the witness holes to flush out debris, then optionally apply a quick spray of WD-40 or silicone oil to displace moisture.
Full disassembly should only be performed if a field flush does not resolve a gritty follower or to fine-tune follower.
- Remove the Screws: Use a T5 Torx driver to completely remove all screws securing the magazine body halves together.
- Pry the Body Apart: Because the internal location pins fit tightly, use a small pry bar to carefully spread the two halves apart. Caution: Keep your hand covering the internals as you open it. The spring is under tension and can easily launch the follower a considerable distance if it escapes.
- Clean and Lubricate: Use Isopropyl Alcohol (IPA) to dissolve and wipe away any bullet wax residues built up inside the body. Apply a very light coat of oil only to the specific surfaces where the follower slides against the magazine wall.
- Seat the Spring: This billet design does not use a removable baseplate, so the spring must be managed while closing the shell. Bring the two halves together, and use the corner of a credit card or a guitar pick to push the spring up from the bottom so it seats correctly inside the body.
- Secure and Torque: While holding the halves slightly pinched together so the spring doesn’t escape, insert the screws. Tighten them very lightly. Aim for about 0.15 Nm — a good rule of thumb is to only apply the torque you can generate by pressing your pinky against your thumb.
4. Fine-Tuning the Follower
If the presentation angle of the cartridge isn’t perfectly aligned with your specific rifle’s chamber, the follower can be physically tuned to achieve flawless, damage-free feeding.
When to Tune (The Symptoms):
- Strong Signal: You experience consistent feeding jams as the bolt pushes the round forward.
- Weak Signals: You notice a buildup of shaved lead around the barrel chamber, or your group sizes on target are significantly larger when feeding from the magazine compared to single-loading by hand. This indicates the bullet is dragging and deforming slightly during feeding.
Just a heads up: the same symptoms can be due to different issues with your system – like a cracked mag well, a dirty chamber, an action that’s not quite right, and more.
How to Adjust the Presentation Angle:
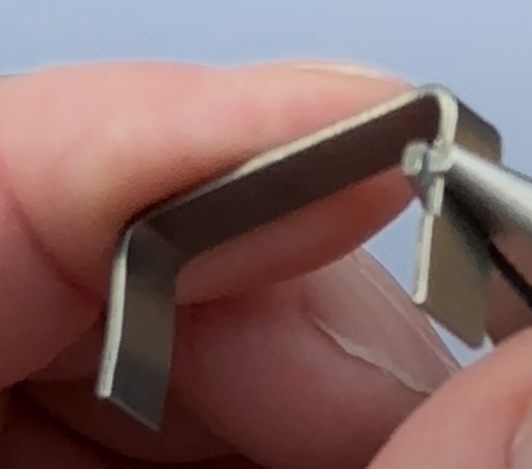
The goal is to align the nose of the bullet perfectly with the chamber. You adjust this by changing the angle between the front vertical part and the top part of the follower.
- If the bullet jams BELOW the lower edge of the chamber: You need to increase the presentation angle to move the bullet nose up. To do this, bend the front vertical part and the top part slightly closer together (creating a smaller angle).
- If the bullet jams ABOVE the higher edge of the chamber: You need to decrease the presentation angle to move the bullet nose down. To do this, bend the front vertical part and the top part slightly further apart.
The Amount to Bend:
This is a highly delicate adjustment. Apply just enough pressure with the intention of moving the nose of the bullet by a maximum of 1mm. Wee recommend using pliers for it.
Maintaining Consistent Feeding:
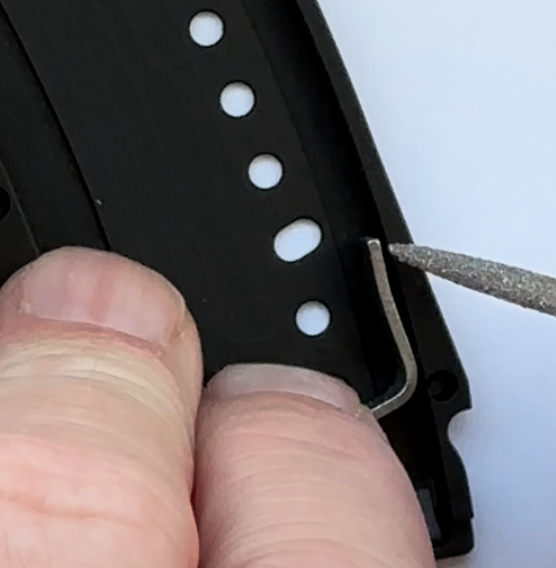
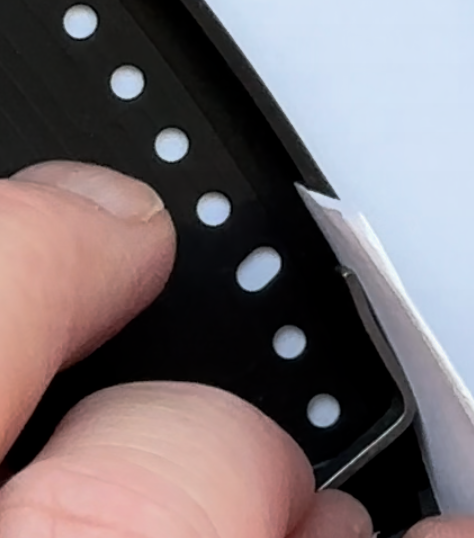
After adjusting the presentation angle, you must ensure the follower remains stabilized so the angle stays consistent regardless of how many rounds are loaded. Check the back lower edge of the follower — it must sit very close to the back wall of the magazine body. Aim for a clearance of about 0.1mm to 0.2mm, and ensure there is no gap larger than 0.5mm. You should be able to slide in 2 layers of paper but not 5 layers.
Example of modified followers
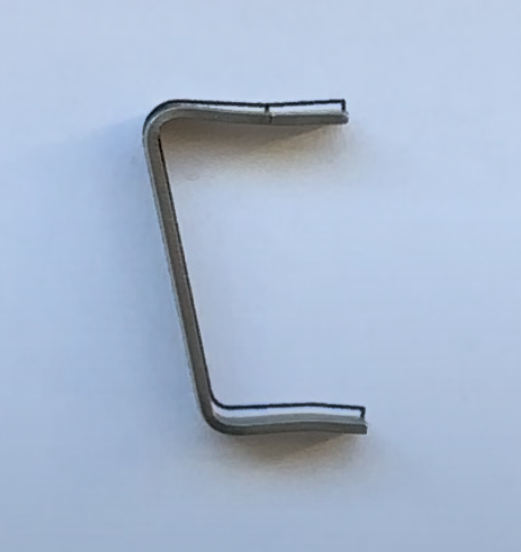
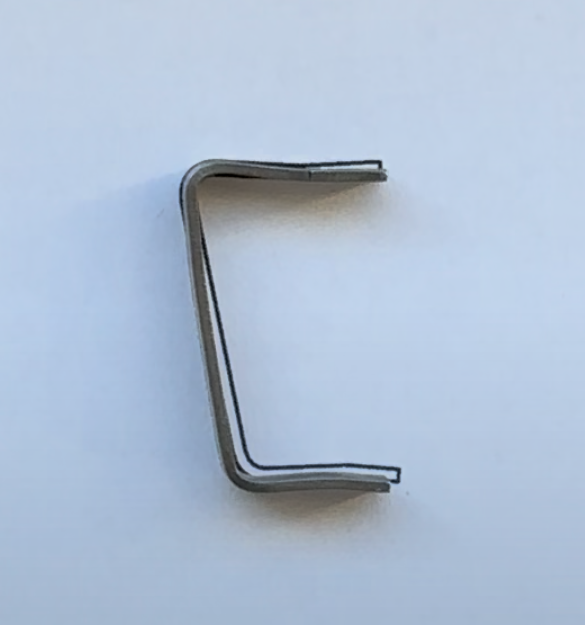
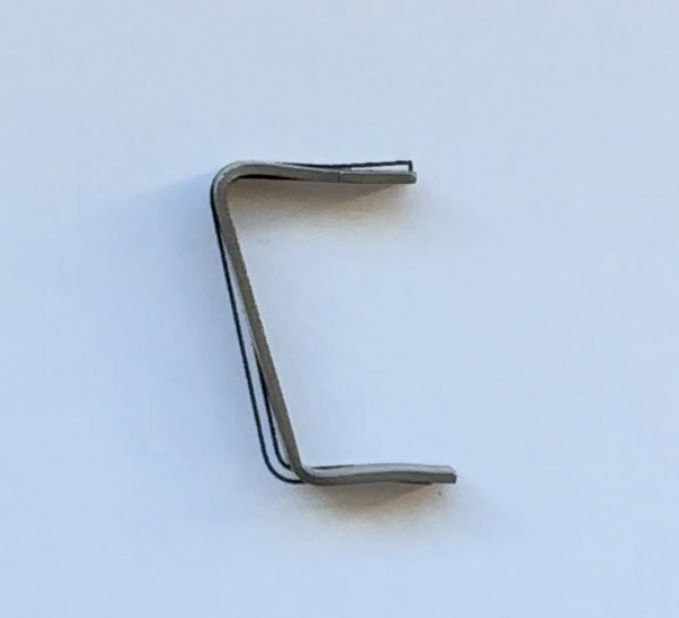
Standard, steeper and shallower presentation angle. Bellow is PDF which when printed at 100% scale can bee used as reference standard shape.
Additional resources
In the following video, you see how to build / rebuild your magazine:
https://youtu.be/xSHVAEhuaD0
You can also download digital print files for tools used in this video
Files included:
Magazine testing tool
Magazine assembly tool (guitar pic)
10 round limiter insert
Happy shooting!